
Car battery replacement at home is a manageable DIY task that most car owners in Northamptonshire can complete in 25–40 minutes with basic hand tools and the right safety precautions. The industry term is "battery exchange" or "battery swap," though DIY battery replacement is the phrase most owners search for. Getting it right means understanding the correct sequence for disconnecting and reconnecting terminals, matching the battery specification to your vehicle, and knowing when a modern car's electronics require extra steps. Skip any of those, and you risk sparks, a flat battery within weeks, or an expensive electrical fault.
What tools and safety equipment do you need for battery replacement at home?
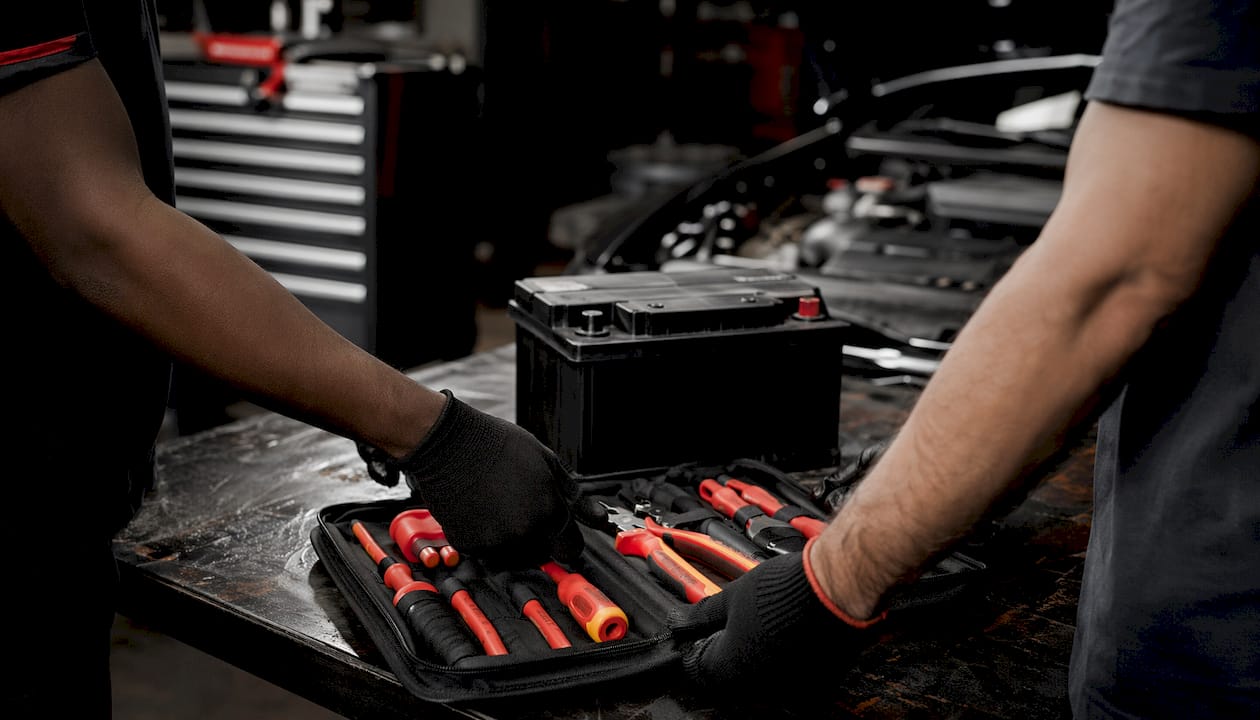
The biggest risks during a home battery change are chemical hazards and electric shorts, not mechanical difficulty. That means your safety kit matters as much as your spanners.
Essential tools:
- Spanners or socket set: Most car batteries use 10mm, 12mm, or 13mm nuts on the terminal clamps. A socket set covers all three.
- Torque wrench: Terminal nuts need 4–6 Nm of torque. That is far lower than most mechanical fasteners, and most DIYers overtighten, cracking the lead post.
- Safety glasses: Sulphuric acid vapour is present near a battery. Eye protection is non-negotiable.
- Nitrile or rubber gloves: Acid burns happen fast. Nitrile gloves cost under £5 and eliminate that risk entirely.
- Wire brush or terminal cleaner: White or blue-green powder on terminals is corrosion. It creates resistance and reduces charging efficiency.
- Memory saver device: Vehicles with coded radios or complex ECUs lose their settings when the battery is disconnected. A memory saver device connects through the OBD-II port and maintains 9–12V on the vehicle bus during the swap. These cost roughly £15–£30 from most auto parts retailers.
- Anti-corrosion spray or terminal grease: Applied after reconnection, this extends the life of the battery connection significantly.
Pro Tip: Buy a memory saver before you start, not after. Reconnecting a battery without one on a modern car can wipe radio codes, reset the ECU, and trigger warning lights that take days to clear.
Step-by-step process to replace a car battery safely at home
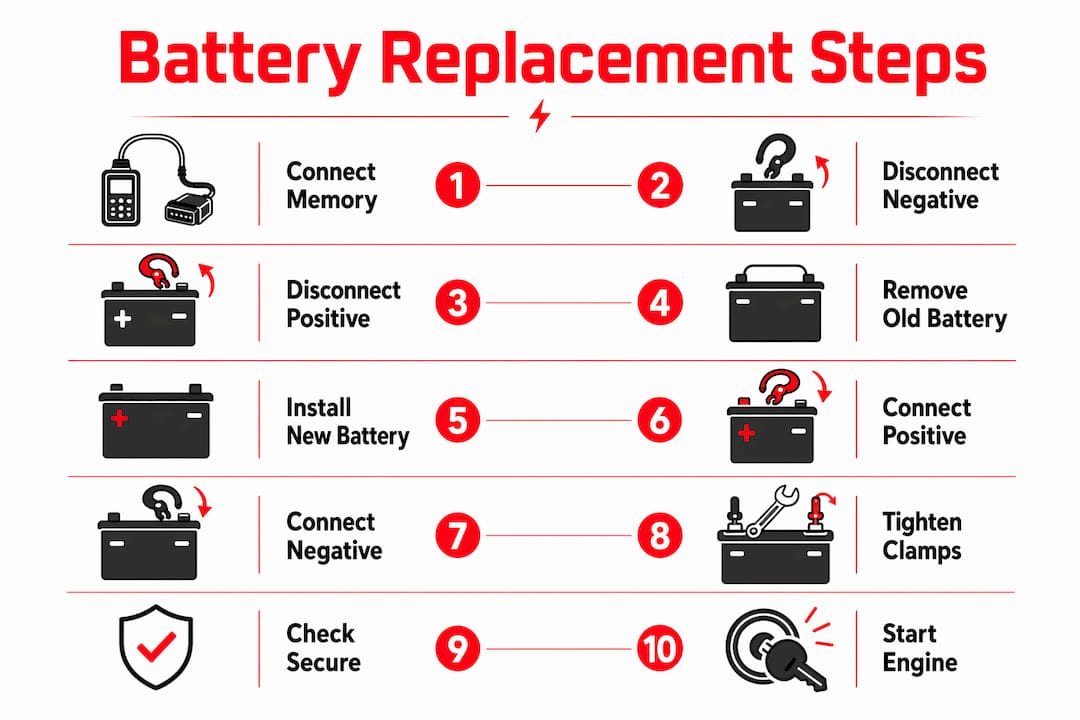
A clear sequence is the difference between a clean job and a costly mistake. Follow these steps in order.
-
Park on a flat, stable surface. Switch the engine off and remove the key from the ignition. Leave the car to cool for at least ten minutes if it has been running.
-
Locate the battery. Most batteries sit under the bonnet, but on some vehicles, particularly newer European models, the battery is in the boot or under a rear seat. Check your owner's manual if you cannot find it immediately.
-
Connect the memory saver. If your vehicle has a coded radio, anti-theft system, or complex ECU, plug in the memory saver via the OBD-II port before touching any terminals. This preserves all stored settings during the swap.
-
Disconnect the negative terminal first. The negative terminal is marked with a minus sign (–) and usually has a black cable. Loosen the clamp nut, slide the cable off, and tuck it away from the battery post. Disconnecting negative first prevents short circuits. Touching the positive terminal with a spanner while the negative is still connected can arc directly to the chassis.
-
Disconnect the positive terminal. The positive terminal is marked with a plus sign (+) and usually has a red cable. Remove it the same way and keep it clear of the negative post.
-
Remove the hold-down bracket. Most batteries are secured by a bracket at the base or a clamp across the top. Remove the bolt or nut holding it in place and set the bracket aside safely.
-
Lift the battery straight out. Car batteries are heavy, typically 12–20 kg. Lift with both hands, keeping the battery level to avoid spilling any residual acid. Place it on a flat surface away from the work area.
-
Clean the battery tray and cable terminals. White or blue-green powder on the tray or terminals is corrosion. Use a wire brush or terminal cleaner to remove it fully. A clean connection is critical for reliable starting.
-
Place the new battery in the tray. Check the terminal orientation before lowering it in. The positive post must align with the positive cable, and the negative post with the negative cable. Getting this wrong is a common and expensive mistake.
-
Reconnect the positive terminal first. Slide the clamp onto the positive post and tighten the nut to 4–6 Nm. Firm contact without stress on the post is the target.
-
Reconnect the negative terminal. Tighten to the same torque specification. Apply anti-corrosion spray or a thin layer of terminal grease to both connections.
-
Reinstall the hold-down bracket. A battery that moves while driving can damage terminals and cause intermittent faults. Secure the bracket firmly.
-
Switch off the memory saver. If you used one, disconnect it from the OBD-II port now.
Pro Tip: Before starting the engine, double-check that both terminal clamps are tight and no tools are resting on the battery or near the terminals.
| Step | Action | Key detail |
|---|---|---|
| Before disconnecting | Connect memory saver | Preserves ECU and radio settings |
| Disconnecting | Negative terminal first | Prevents short circuits |
| Reconnecting | Positive terminal first | Correct sequence avoids sparks |
| Torque | 4–6 Nm on terminal nuts | Prevents cracking lead posts |
| After reconnecting | Apply anti-corrosion spray | Extends connection life |
Common mistakes and how to troubleshoot them
Most DIY battery replacement errors fall into a small number of categories. Knowing them in advance prevents the majority of problems.
- Wrong terminal order: Connecting or disconnecting in the wrong sequence is the most frequent dangerous mistake. Always disconnect negative first and connect negative last.
- Wrong battery specification: Matching battery group size, cold cranking amps (CCA), and reserve capacity is critical. A battery with insufficient CCA will struggle to start the car in cold Northamptonshire winters. Check your owner's manual or the label on the old battery before purchasing.
- Overtightening terminal nuts: Most DIYers apply far too much force. Lead posts crack above 8–10 Nm, which causes poor contact and reduces battery life. Use a torque wrench set to 4–6 Nm.
- Skipping battery registration on managed systems: Vehicles with battery management systems, common on newer European models, require battery registration after replacement. Skipping this step causes the alternator to overcharge the new battery, dramatically shortening its lifespan. This step requires a specialist scan tool and is best handled professionally if you are unfamiliar with the process.
- Replacing a battery that does not need replacing: Many drivers waste money replacing batteries that are actually healthy. A CCA load test diagnoses battery health reliably. Most batteries fail between 3–5 years depending on climate and usage, but condition matters more than age.
After fitting a new battery, start the engine and let it idle, then drive for approximately 20 minutes. This allows the alternator to fully charge the battery and confirms the charging system is working correctly. Check that the battery warning light on the dashboard is off before driving any distance.
Pro Tip: If the battery warning light stays on after a 20-minute drive, the fault is likely with the alternator or charging circuit, not the battery itself.
How to dispose of your old car battery responsibly
Old car batteries contain sulphuric acid and lead, both of which are classified as hazardous materials. Disposing of them incorrectly is illegal and environmentally harmful.
- Never place a used battery in household waste. Lead-acid batteries are classified as universal waste and require approved disposal routes.
- Use your local auto parts store. Most auto parts retailers accept used batteries for free recycling. Many will take the old one when you collect the new one.
- Tape the terminals before transporting. Cover both posts with electrical tape to prevent accidental short circuits during handling and transport.
- Check your local council's hazardous waste programme. Northamptonshire residents can use household hazardous waste collection points for batteries that cannot be returned to a retailer.
- Recycling recovers valuable materials. Lead from old batteries is almost entirely recyclable and re-enters the manufacturing supply chain. Responsible disposal genuinely matters here.
Pro Tip: Keep the old battery in the box the new one came in for transport. It contains the terminals safely and makes handling much easier.
Key takeaways
Replacing a car battery at home is safe and cost-effective when you follow the correct sequence, use the right tools, and match the battery specification to your vehicle.
| Point | Details |
|---|---|
| Correct terminal order | Always disconnect negative first and reconnect negative last to prevent sparks and shorts. |
| Torque matters | Tighten terminal nuts to 4–6 Nm only; overtightening cracks lead posts and reduces battery life. |
| Memory saver is critical | Use one on any vehicle with a coded radio or complex ECU to preserve settings during the swap. |
| Match the specification | Check group size, CCA, and reserve capacity against your owner's manual before buying. |
| Dispose responsibly | Return the old battery to an auto parts store or household hazardous waste point for free recycling. |
Why patience is the most underrated tool in this job
I have watched car owners rush a battery swap and create problems that cost far more than the original job. The terminal order mistake is the one that catches people out most often. It feels counterintuitive to disconnect the negative first when the positive is the "live" terminal, but the logic is sound. The chassis is the ground return for the entire electrical system. Disconnect the negative first, and you break that ground path. Any accidental contact with the spanner after that point is harmless. Leave the negative connected, and a spanner touching the positive terminal and any metal on the car simultaneously creates a direct short.
The memory saver is the other thing I would never skip on a modern car. I have seen drivers spend an afternoon at a dealership getting radio codes reset and ECU adaptations relearnt, all because they saved £20 by skipping a device that takes 30 seconds to connect. On older vehicles from the 1990s or early 2000s, it is less critical. On anything with stop-start technology, adaptive cruise control, or a coded radio, it is not optional.
The last thing I would say is this: do a load test before you buy a replacement battery. Many batteries that appear dead are actually fine and have simply been discharged by a faulty alternator or a parasitic drain. Replacing a healthy battery solves nothing. A load test takes five minutes at most auto parts stores and tells you definitively whether the battery is the problem.
— Glen
Astroautomotive: professional support when you need it
Car owners across Northamptonshire who prefer a certified technician to handle the job can rely on Astroautomotive for professional mobile battery replacement at their home or workplace. No garage visit required.

Astroautomotive employs certified technicians who carry the correct tools, including torque wrenches and battery registration scan tools, for every job. The service covers battery supply, fitting, terminal cleaning, and responsible disposal of the old unit. With over 1,000 serviced vehicles and a 99% satisfaction rate, Astroautomotive is the trusted choice for car owners who want the job done correctly the first time. Transparent pricing and flexible service packages mean there are no surprises. Visit Astroautomotive to book a mobile battery service at a time that suits you.
FAQ
How long does a DIY battery replacement take?
A typical DIY car battery replacement takes 25–40 minutes. That includes disconnecting the old battery, cleaning the terminals, fitting the new one, and completing post-installation checks.
Do I need to disconnect the negative or positive terminal first?
Always disconnect the negative terminal first. Disconnecting negative first breaks the ground return path and prevents short circuits if the spanner contacts any metal on the car.
What is a memory saver and do I need one?
A memory saver maintains 9–12V on the vehicle's electrical bus during the battery swap, preserving ECU settings, radio codes, and adaptation data. Any vehicle with a coded radio, stop-start system, or complex ECU requires one.
How do I know if my car needs battery registration after replacement?
Vehicles with battery management systems, common on newer European models, require battery registration after a swap. Check your owner's manual or ask a technician. Skipping registration causes the alternator to overcharge the battery and shortens its lifespan.
Where can I recycle my old car battery in Northamptonshire?
Most auto parts retailers accept used car batteries for free recycling. Northamptonshire residents can also use local council household hazardous waste collection points. Tape the terminals before transporting the battery.