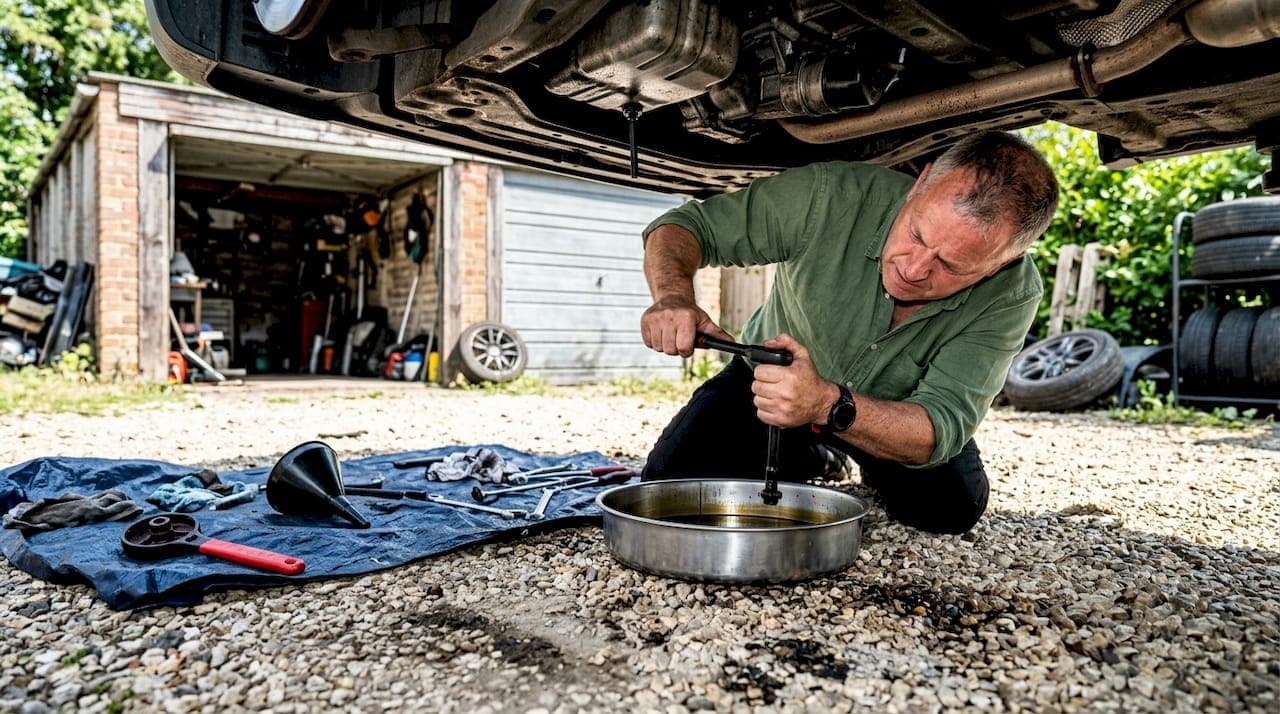
An oil change at home is defined as the process of draining degraded engine oil and replacing it with fresh oil, without visiting a garage. This DIY maintenance task keeps your engine protected against wear, prevents power loss, and saves the professional labour charge. Most vehicles require oil changes every 8,000 to 10,000 km or every six months. Short trips, heavy traffic, and high temperatures in Derbyshire winters call for closer monitoring. With the right tools and a methodical approach, the full process takes 30 to 45 minutes and is well within reach for any car owner prepared to follow the steps correctly.
What tools and materials do you need for an oil change at home?
Having every tool ready before you start prevents delays and reduces the risk of oil spills. Essential tools for a DIY oil change include a socket wrench for the drain plug, an oil filter wrench or pliers, a drain pan, a funnel, a hydraulic jack, and a set of jack stands or ramps.
Tools checklist
- Socket wrench and correct socket size for your drain plug
- Oil filter wrench or adjustable pliers
- Drain pan (capacity of at least 6 litres)
- Funnel
- Hydraulic jack and two jack stands, or a pair of drive-up ramps
- Nitrile gloves and clean rags
- Sealed container for used oil storage
Consumables
- Fresh engine oil in the correct grade for your vehicle (check your owner's manual)
- New oil filter compatible with your make and model
- Replacement crush washer for the drain plug
The correct oil grade is non-negotiable. Using the wrong viscosity, such as 5W-30 in an engine specifying 0W-20, reduces lubrication efficiency and accelerates wear. Your owner's manual lists the manufacturer's specification; follow it exactly.
| Item | Purpose |
|---|---|
| Socket wrench | Removes and reinstalls the drain plug |
| Oil filter wrench | Loosens a tight or factory-fitted filter |
| Drain pan | Catches used oil cleanly |
| Jack stands or ramps | Supports the vehicle safely while you work underneath |
| Crush washer | Seals the drain plug thread to prevent leaks |
Pro Tip: Buy a slightly larger drain pan than you think you need. Oil often splashes when it first hits the pan, and a shallow container creates a mess on your garage floor.
How do you perform a DIY oil change step by step?
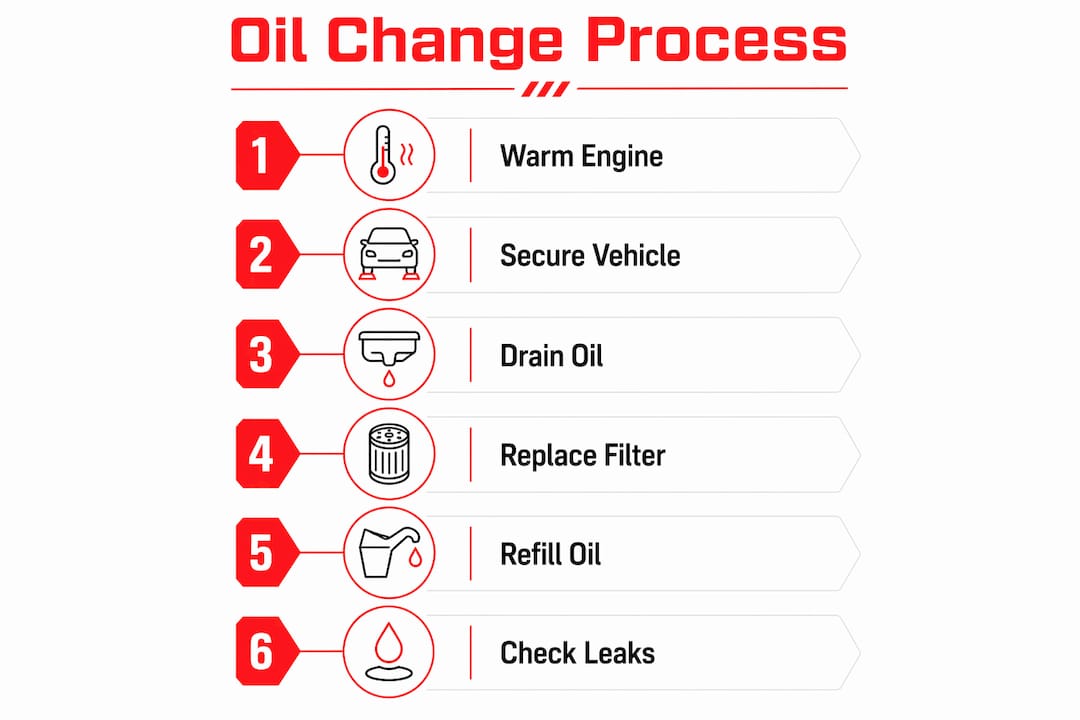
The step-by-step process follows a fixed sequence. Skipping or reordering steps causes leaks, overfilling, or safety incidents.
Step 1: Warm the engine
Run the engine for 2 to 3 minutes, then switch it off. Warm oil drains more efficiently than cold oil, but working on a scalding hot engine is dangerous. Allow the engine to rest for 10 minutes after running it. The oil should feel warm to the touch on the exterior surfaces, not burning hot.

Step 2: Secure the vehicle
Park on a flat, level surface. Engage the handbrake fully and chock the rear wheels with bricks or purpose-made wheel chocks. Lift the front of the vehicle with a hydraulic jack at the manufacturer's designated jacking point. Place jack stands under the vehicle's reinforced sill points before lowering the car onto them. Never rely on a hydraulic jack alone; it can fail without warning. Once the car rests on the stands, give it a firm shake to confirm stability before going underneath.
Step 3: Drain the old oil
Slide under the vehicle and locate the drain plug on the underside of the sump. Position your drain pan directly beneath it. Use the socket wrench to loosen the plug anticlockwise, then remove it by hand. Oil will flow immediately, so keep your arm clear. Wait 10 to 15 minutes for the flow to slow to a drip, confirming full drainage. Inspect the crush washer on the drain plug. Replace it if it is flattened or damaged; a worn washer is a common source of post-change leaks.
Replacing the crush washer at every oil change costs less than £1 and eliminates one of the most frequent causes of sump leaks after a DIY service. Never reuse a deformed washer.
Reinstall the drain plug by hand first to avoid cross-threading, then tighten with the socket wrench to the torque specified in your owner's manual. Do not overtighten.
Step 4: Replace the oil filter
Locate the oil filter, which is typically a cylindrical canister mounted on the engine block. Use the oil filter wrench to loosen it anticlockwise. Have a rag ready; residual oil will spill as you remove it. Before fitting the new filter, apply a thin layer of fresh oil to the rubber gasket on the new filter. This ensures a proper seal and makes removal easier at the next service. Hand-tighten the new filter until snug, then add a quarter turn. Overtightening damages the gasket and causes leaks.
Pro Tip: Before fitting the new filter, check that the old gasket has not stuck to the engine block. A double gasket is a guaranteed oil leak and a common beginner mistake.
Step 5: Refill with fresh oil
Lower the vehicle off the jack stands. Remove the oil filler cap on top of the engine and insert your funnel. Start with one litre less than the full capacity listed in your owner's manual. Replace the filler cap, start the engine, and let it run for 60 seconds. Switch off and wait two minutes for the oil to settle. Pull the dipstick, wipe it clean, reinsert it fully, then withdraw it again to read the level. Top up in small increments until the level sits between the minimum and maximum marks.
Step 6: Check for leaks
With the engine off and the car on level ground, inspect the drain plug and oil filter for any seepage. Run the engine again for two minutes, then recheck both points. A dry inspection confirms the job is complete.
What common mistakes should you avoid when changing oil at home?
Most DIY oil change problems are preventable. The errors below account for the majority of post-service leaks, engine damage, and safety incidents.
- Working under a jack-supported car. A hydraulic jack is a lifting tool, not a support. Always transfer the vehicle's weight to jack stands before going underneath.
- Draining oil while the engine is scalding hot. Hot oil causes serious burns. The "warm, not scalding" rule protects you and still allows efficient drainage.
- Overtightening the drain plug or filter. Excess torque strips threads and cracks filter housings. Hand-tight plus a quarter turn is sufficient for the filter; use a torque wrench for the drain plug if you have one.
- Forgetting to replace the crush washer. A flattened washer will not seal correctly. Replace it every time.
- Leaving the old filter gasket on the engine block. Fitting a new filter over a stuck old gasket creates a double seal that fails under pressure.
- Overfilling the oil. Excess oil foams under the crankshaft, loses its lubricating properties, and can damage seals. Always check the dipstick after running the engine.
- Mixing oil grades. Topping up a 5W-30 fill with 0W-20 alters viscosity and reduces protection. Use only the specified grade throughout.
Used engine oil must never be poured down a drain, onto soil, or into general waste. Improper disposal is illegal and contaminates groundwater. Store it in a sealed container immediately after draining.
Pro Tip: Keep a small notebook in your glovebox and record the date, mileage, oil grade, and filter reference after each service. This log proves maintenance history and adds value when selling the vehicle.
How should you dispose of used oil and filters?
Used engine oil is classified as hazardous waste and demands responsible handling. One litre of used oil can contaminate up to one million litres of groundwater, making correct disposal a legal and environmental obligation.
Store used oil in the sealed container your fresh oil came in, or in any clean, sealable plastic container. Do not mix it with other fluids such as coolant or brake fluid, as this makes recycling impossible.
Used oil filters retain residual oil and must be drained into your pan before disposal. Place drained filters in a sealed bag.
Disposal options in Derbyshire include:
- Local Household Waste Recycling Centres operated by Derbyshire County Council
- Participating motor factors and auto retailers that accept used oil
- Authorised oil recycling collection services
Contact Derbyshire County Council's waste services or check the Oil Care Campaign website to locate your nearest drop-off point. Recycled engine oil is re-refined into base oil or used as industrial fuel, so your effort directly reduces environmental harm.
Key takeaways
A DIY oil change at home saves money, protects engine performance, and is achievable in under an hour when the correct tools, safety steps, and disposal practices are followed.
| Point | Details |
|---|---|
| Change frequency | Most vehicles need fresh oil every 8,000–10,000 km or every six months. |
| Safety first | Always use jack stands; never work under a car supported by a jack alone. |
| Filter technique | Lubricate the new filter gasket with fresh oil and hand-tighten plus a quarter turn only. |
| Avoid overfilling | Start with less oil than full capacity, run the engine, then top up using the dipstick. |
| Dispose responsibly | Store used oil in sealed containers and take it to an authorised recycling centre. |
What I have learned from doing oil changes myself
The first time I changed my own oil, it took nearly twice as long as expected. Not because the job is difficult, but because I had not laid everything out in advance. I spent ten minutes hunting for a rag while oil dripped steadily into the pan. That experience taught me that preparation is the actual skill in a DIY oil change. The mechanical steps are straightforward; the discipline of setting up correctly is what separates a clean job from a messy one.
The mistake I see most often in beginners is skipping the dipstick check after running the engine. People fill to the maximum mark on the dipstick before starting the engine, then wonder why the level reads slightly over after the oil circulates. Starting with less than full capacity and topping off after a short run is the correct method, and it prevents the foaming that comes from overfilling.
One more thing: do not let a stuck drain plug or a tight filter rattle your confidence. Both are common, particularly on older vehicles or cars that have been serviced at high-torque garages. A breaker bar on the drain plug and a strap-style filter wrench on the canister will solve both problems without drama.
The reward for getting this right is real. You know exactly what oil grade went in, you know the filter is new, and you have a dated record in your glovebox. That level of certainty about your own vehicle is worth more than the labour charge you saved.
— Glen
Astroautomotive: support for your home car maintenance
Car owners in Derbyshire who want to keep their vehicles in top condition between professional services will find practical support at Astroautomotive. The platform connects car enthusiasts with certified technicians who carry out mobile servicing directly at your home or workplace, using premium products and transparent pricing.

Whether you prefer to handle routine tasks yourself or need a qualified technician to step in, Astroautomotive offers flexible options to suit both approaches. The service has covered over 1,000 vehicles and holds a 99% satisfaction rate, making it a dependable resource for Derbyshire car owners who take their maintenance seriously. Visit Astroautomotive to view service packages, monthly plans, and product support for DIY car care.
FAQ
How long does an oil change at home take?
A DIY oil change typically takes 30 to 45 minutes once you have all tools and materials ready. First-time attempts may take longer as you familiarise yourself with your vehicle's layout.
How often should I change my engine oil?
Most vehicles require an oil change every 8,000 to 10,000 km or every six months, whichever comes first. Vehicles used frequently in stop-start traffic or cold conditions may need more frequent changes.
What oil grade should I use for a home oil change?
The correct grade is listed in your vehicle's owner's manual. Using the wrong viscosity reduces engine protection, so always follow the manufacturer's specification rather than defaulting to a common grade.
Can I reuse the crush washer on the drain plug?
Reusing a flattened or deformed crush washer risks a sump leak. Replace it at every oil change; the part costs less than £1 and is available at any motor factor.
Where can I dispose of used engine oil in Derbyshire?
Derbyshire Household Waste Recycling Centres accept used engine oil at no charge. Participating motor factors and auto retailers also collect used oil. Store it in a sealed container before transport and never mix it with other fluids.